How do I add a printer on my Mac? (faculty/staff)
EWU now has a way to self-install any networked printer on your university-owned Mac.
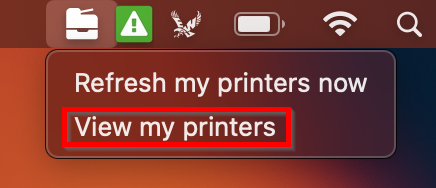
- Locate the Paper Icon in the upper right-hand corner of your system tray, next to the date and time.

- Click on the Icon and an expanding menu will open below it with two options. Click on View my printers.
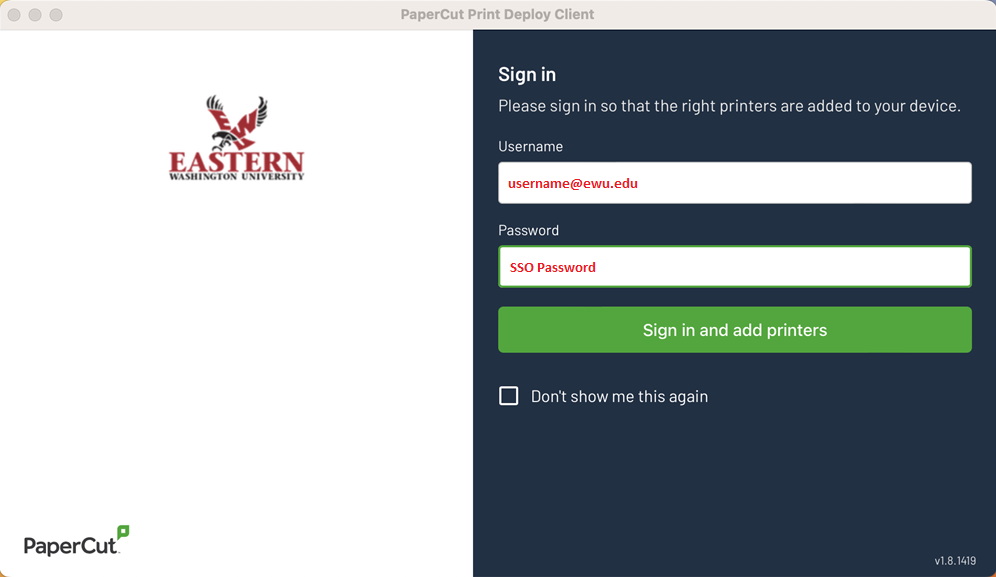
- If you haven't launched or signed into Papercut before, a window will pop up, prompting you to login. Use your e-mail address (username@ewu.edu) and SSO password.
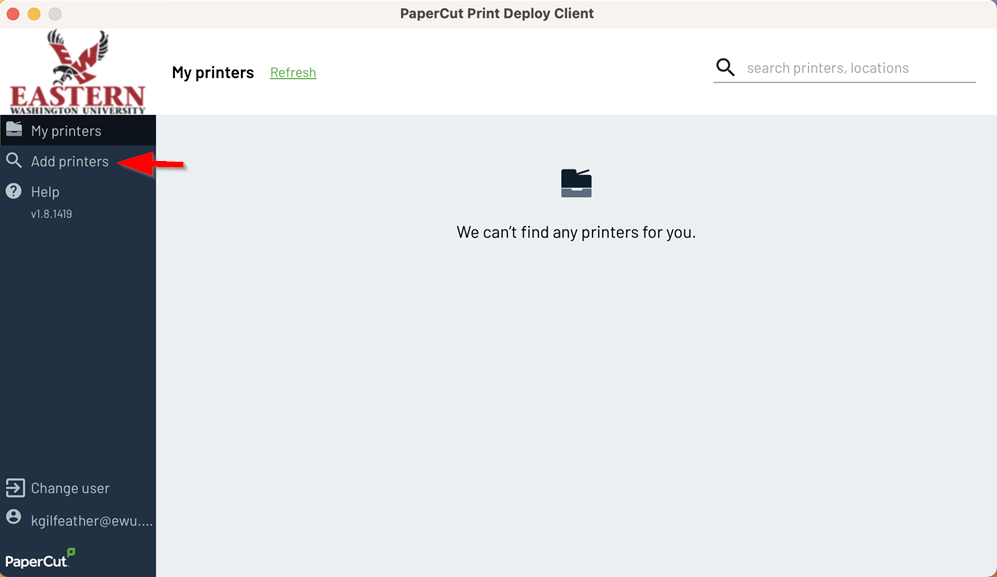
- Click on Add printers on the left menu.
- In the search field at the top right of the window, type the name of the printer you wish to add.
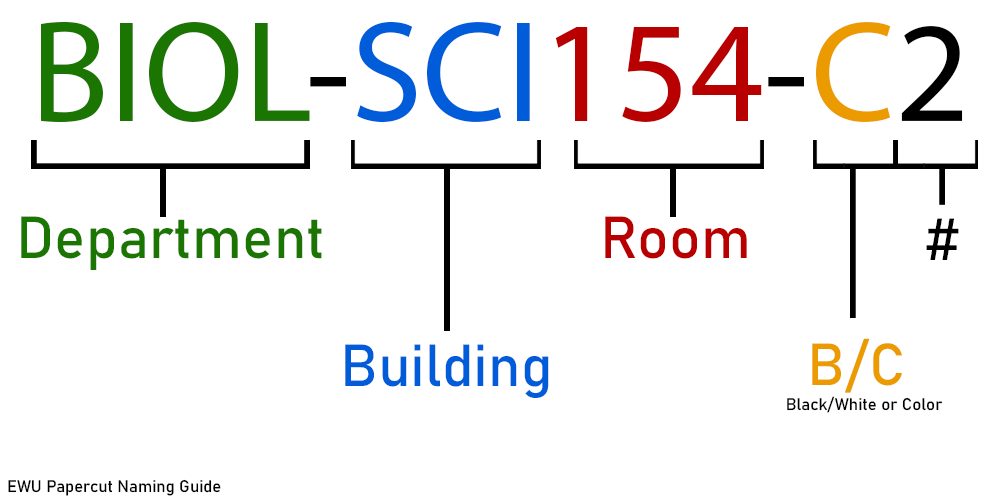
If you do not know the name of the printer, type the name of the building it is located in. You'll notice that all printers have a specific naming scheme: DepartmentAbbreviation_BuildingName+RoomNumber_CforColor_or_BforBlackandWhite.
In our example, we've typed in SUT for Sutton Hall. And we are adding IT_SUT100_C1. This indicates that the printer is managed by IT, and it is located in Sutton Hall, room 100, and it is a color printer.
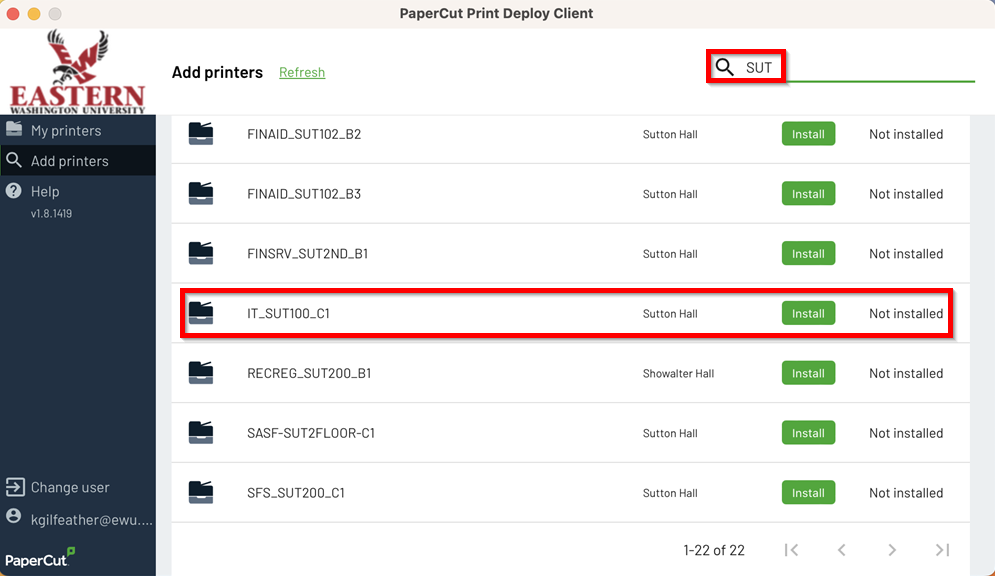
- Once you have selected the correct printer, click on the green Install button.

- You will now see the printer that you've added under the My printers menu.
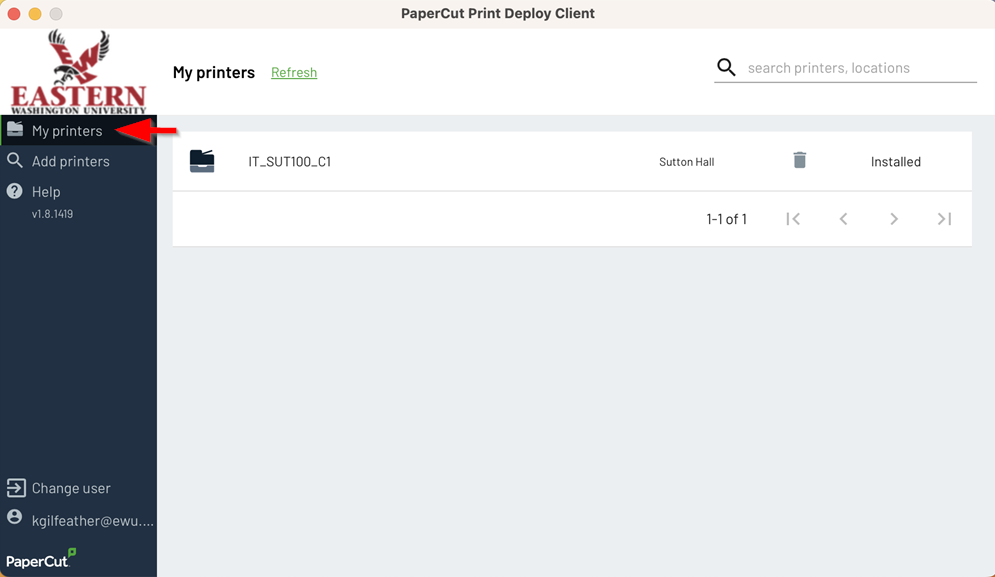
- Note: If you wish to delete a printer from your computer, click on the grey trash can icon, as shown below.

If you are having issues contact the IT help desk by phone at (509) 359-2247 from 8:00am to 5:00pm Monday through Friday, or by email at helpdesk@ewu.edu.
The EWU Papercut Naming Guide may assist you as well.
